Basic Usage
napari-imagej offers two different mechanisms for accessing napari-imagej functionality - both are described below:
The napari-imagej widget
The napari-imagej widget provides headless access to all ImageJ2 functionality, and all third-party plugins written in the ImageJ2 framework. These plugins can be found and run with the napari-imagej searchbar, as shown in the figure below:
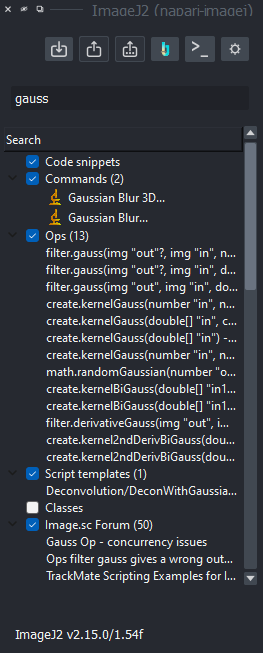
The napari-imagej widget, used to identify ImageJ functionality matching the search term “gauss”
By clicking on an item in the search results, a set of actions is displayed at the bottom of the widget. To execute the selected functionality, users can click the Run button to launch a modal dialog, or they can click the Widget buton to launch a new napari widget (as shown below). Either button will allow the user to provide inputs to the ImageJ2 routine, and once the user confirms the selections the outputs of the routine will appear within the napari application.
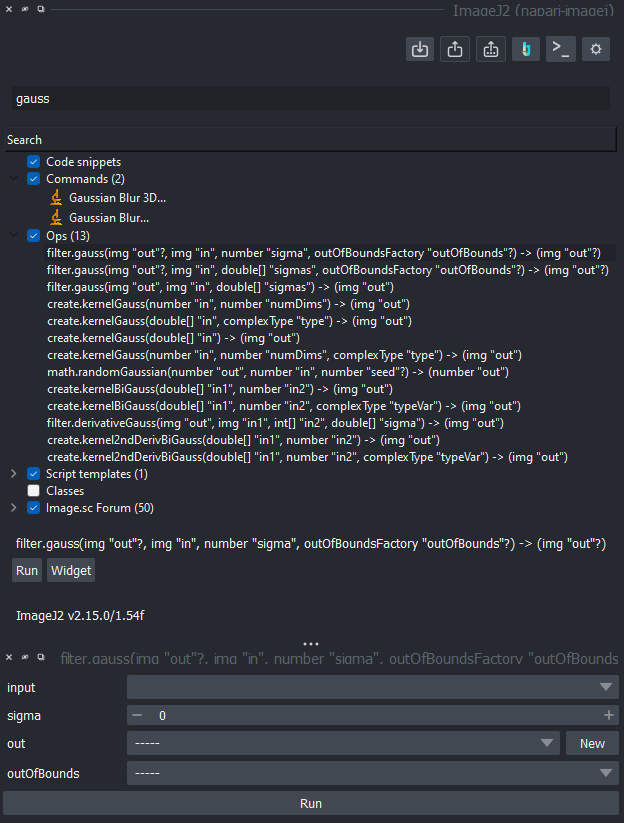
By clicking on the Widget button, a new napari widget is added to prompt the user for ImageJ2 routine input.
Using the ImageJ2 UI
Many ImageJ ecosystem routines cannot be used headlessly - for this reason, napari-imagej also exposes the ImageJ UI to allow their execution within napari.
To launch the ImageJ UI, press the  button in the napari-imagej menu. Once the ImageJ UI is visible, ImageJ can be used as normal (to learn more, see the ImageJ2 documentation).
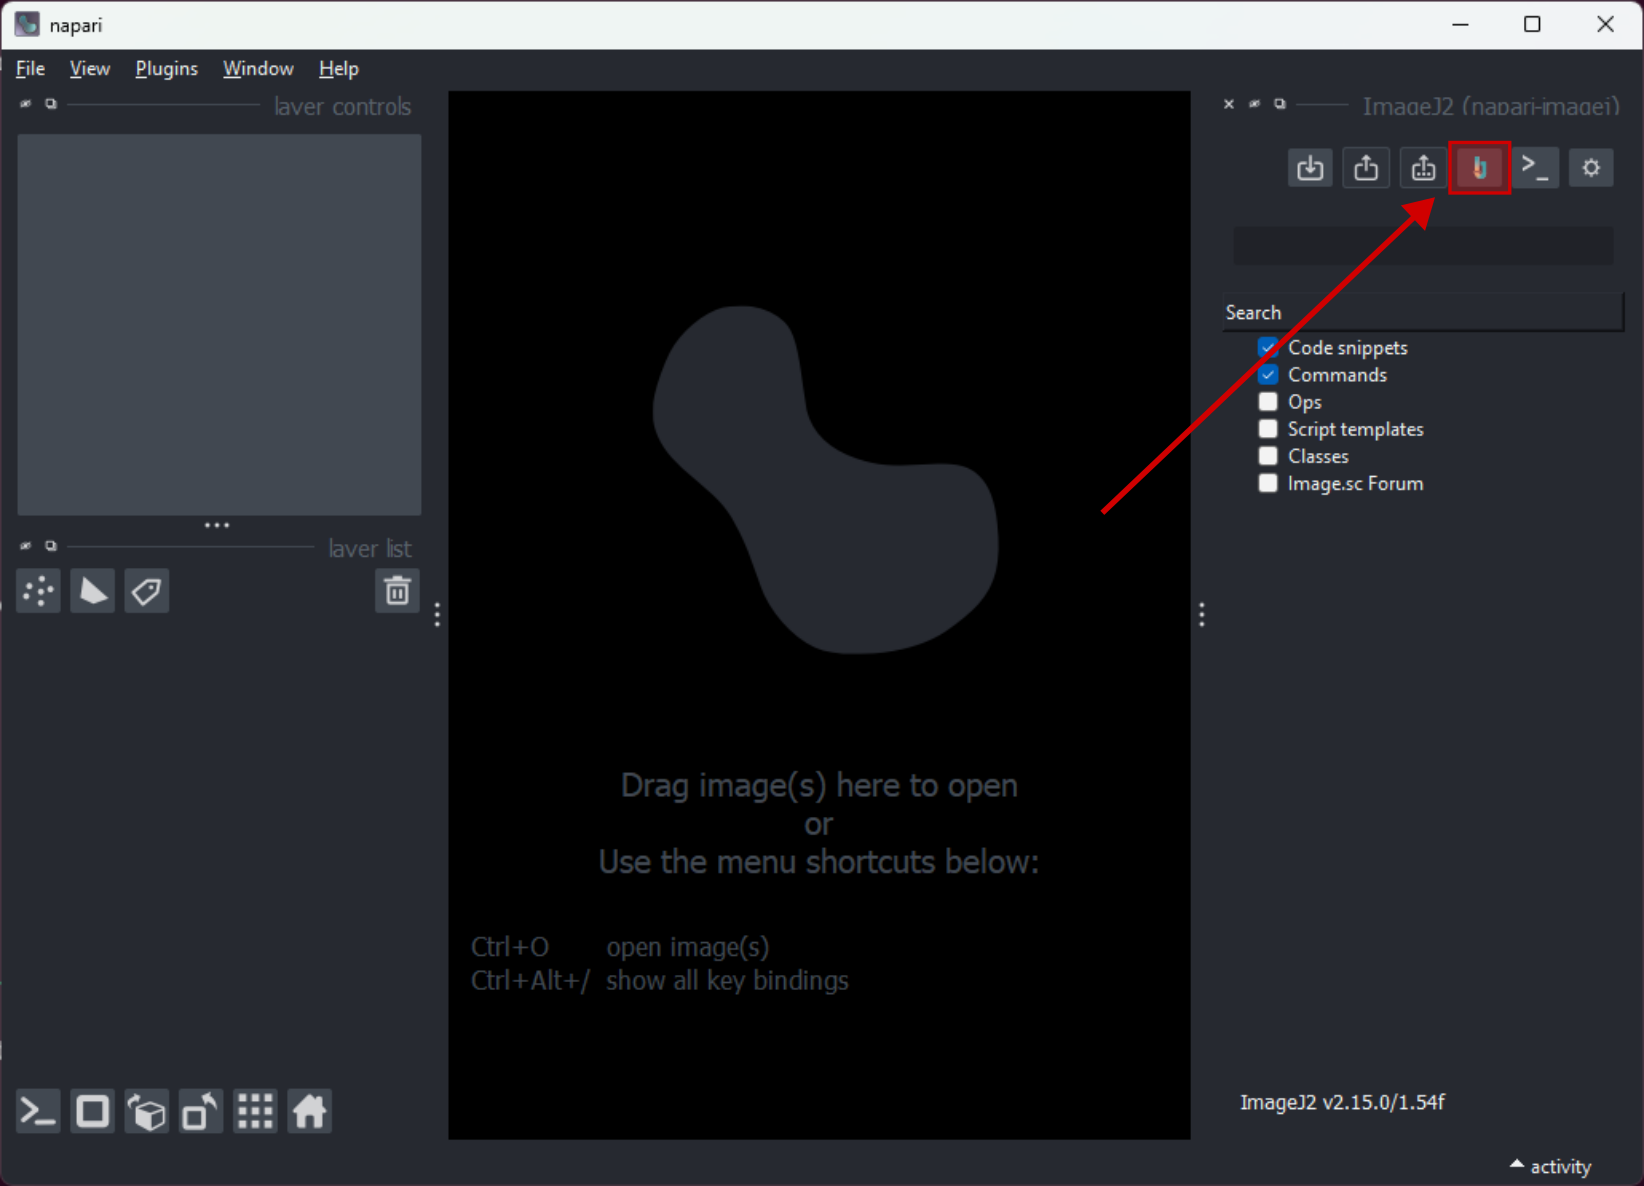
The GUI is launched through the ImageJ button on the napari-imagej menu
Transferring images
To run ImageJ functionality through the ImageJ UI, users must export their data to the ImageJ UI. This can be accomplished on basic images using the  button, which transfers the active napari
 Layer to the ImageJ UI. Additionally, users can press the  button to provide additional details towards the transfer, including:
An additional
PointsorShapesLayerto be linked as ROIsDimension labels for each axis of the image
Layer
Note that these buttons are only enabled when there is a Layer that can be transferred.
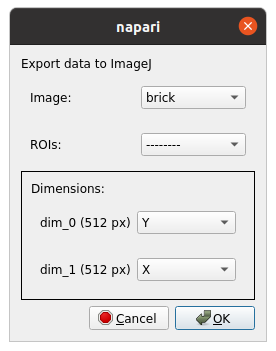
Using the button, users can provide metadata for richer data transfer to the ImageJ UI
The  button can be used to transfer the active ImageJ window back into the napari application.