Tracking HeLa cell nuclei with TrackMate
The TrackMate plugin for ImageJ2 provides a streamlined interface for object tracking. This use case demonstrates how you can use napari-imagej to run the TrackMate plugin on 3D data (X, Y, Time), view the results with napari, and also process them with the napari-stracking plugin.
For this use case we will analyze live cell wide-field microscopy data of HeLa cell nuclei (Hoechst stain), imaged every 30 minutes for 40 frames.
TrackMate Setup
By default, napari-imagej does not include TrackMate. To use the TrackMate plugin, we must first configure napari-imagej to enable TrackMate access.
We can configure napari-imagej to use a Fiji installation as follows:
Activate the napari-imagej plugin by selecting the
ImageJ2plugin from the Plugins menu.Open the settings dialog by clicking the rightmost toolbar button, the gear symbol.
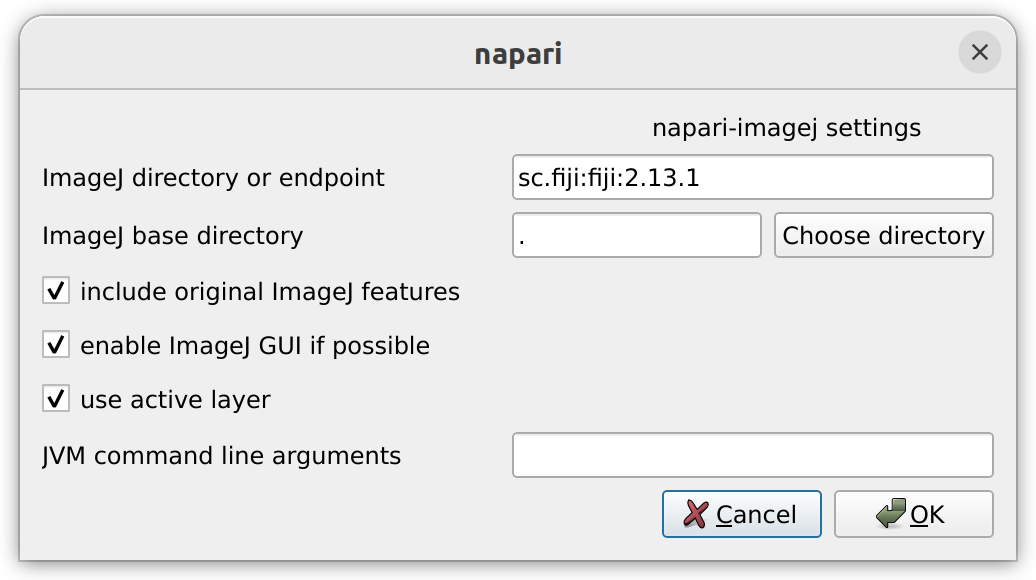
Change the
ImageJ directory or endpoint(described here) to include Fiji, which bundles many popular plugins including TrackMate. This example was created using an endpoint ofsc.fiji:fiji:2.13.1.
Restart napari for the changes to take effect.
Activate the napari-imagej plugin again, as described in step (1) above.
If you wish, you may verify that Fiji is enabled by pasting the following code into napari’s IPython console:
from napari_imagej.java import _ij as ij
ij.app().getApps().keys()
And if Fiji is in the list, you’re good!
Preparing the Data
To run TrackMate, we first need data.
Download the trackmate_example_data.tif sample dataset.
TrackMate will only work on image data that are open in the ImageJ UI. Press  in the napari-imagej menu to launch the ImageJ UI, and then locate the
 File>Open... menu option to open the image.
Running TrackMate
With the data open in the ImageJ UI, start TrackMate by selecting Plugins>Tracking>TrackMate from the ImageJ UI.
TrackMate opens as a wizard to guide you through the tracking process. Steps are advanced with the Next button, and you can always go back and adjust parameters to tune your tracks. For this example we actually do not need to execute all steps of the wizard - just those up through selecting and applying a tracker.
Using the sample data, we used the following properties of these wizard steps:
- Target image: trackmate_example_data
We don’t need any changes here, but ensure you have the correct image selected - you should see
Target image: trackmate_example_dataat the top.
- Select a detector
Select
LoG detectorfrom the dropdown menu.
- LoG detector
Choose the following options:
Estimated object diameter: 17 micron
Quality threshold: 0
Pre-process with media filter: Yes (checked)
Sub-pixel localization: Yes (checked)
You can use the
Previewbutton as a heuristic to ensure that the cells are adequately detected. The preview should be equivalent to the following screenshot: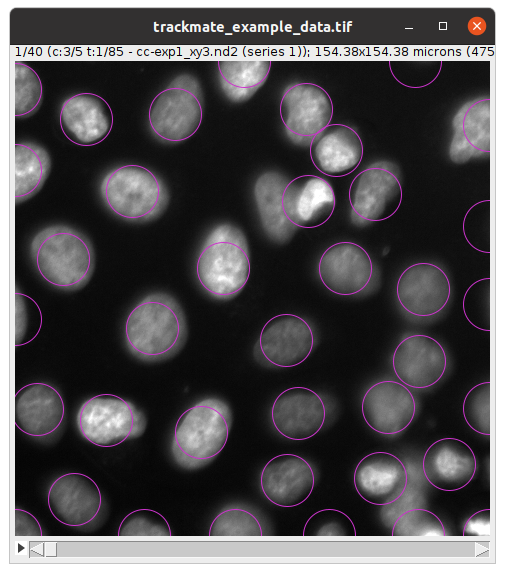
- Detection
Wait for the progress bar at the top of this step to complete, and then press
Next.
- Initial thresholding
Ensure all spots are preserved. You should see
Selected spots: 1496 out of 1496below the bar chart. If not all spots are selected, click and drag left while on the bar chart to ensure the blue threshold covers all bars.
- Set filters on spots
We don’t need any changes here.
- Select a tracker
Select
Simple LAP trackerfrom the dropdown.
- Simple LAP tracker
Choose the following options:
Linking max distance: 8.3 micron
Gap-closing max distance: 5.0 micron
Gap-closing max frame gap: 2
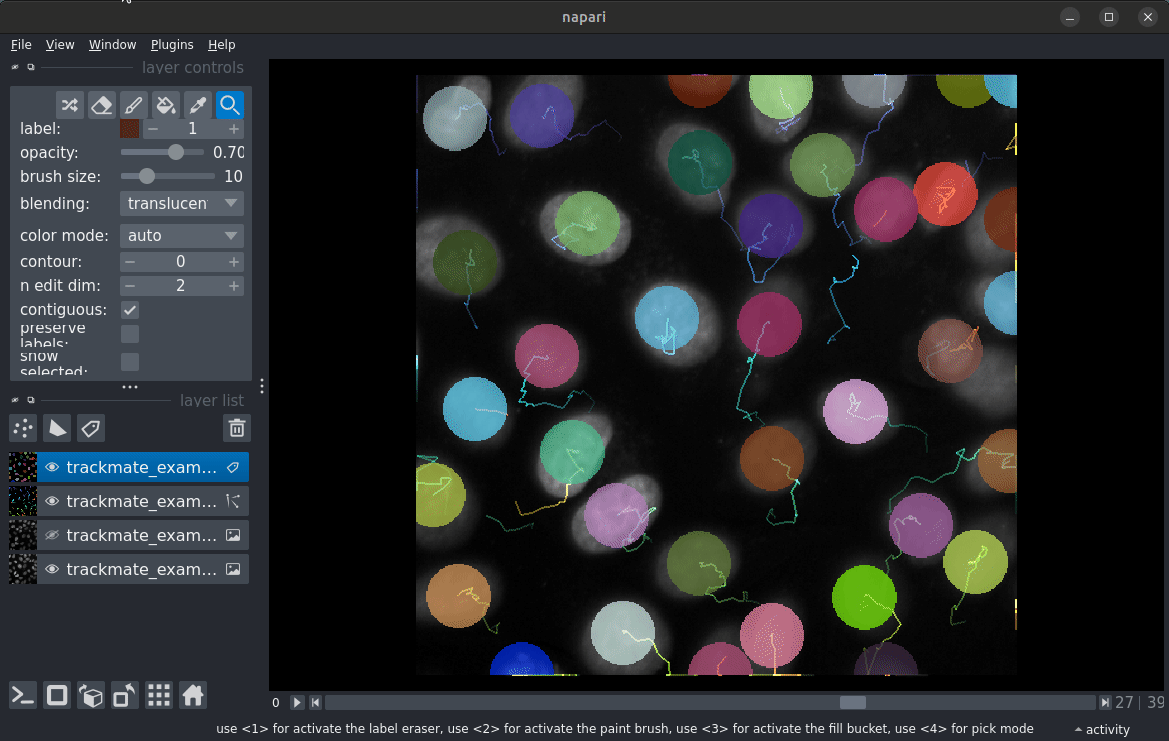
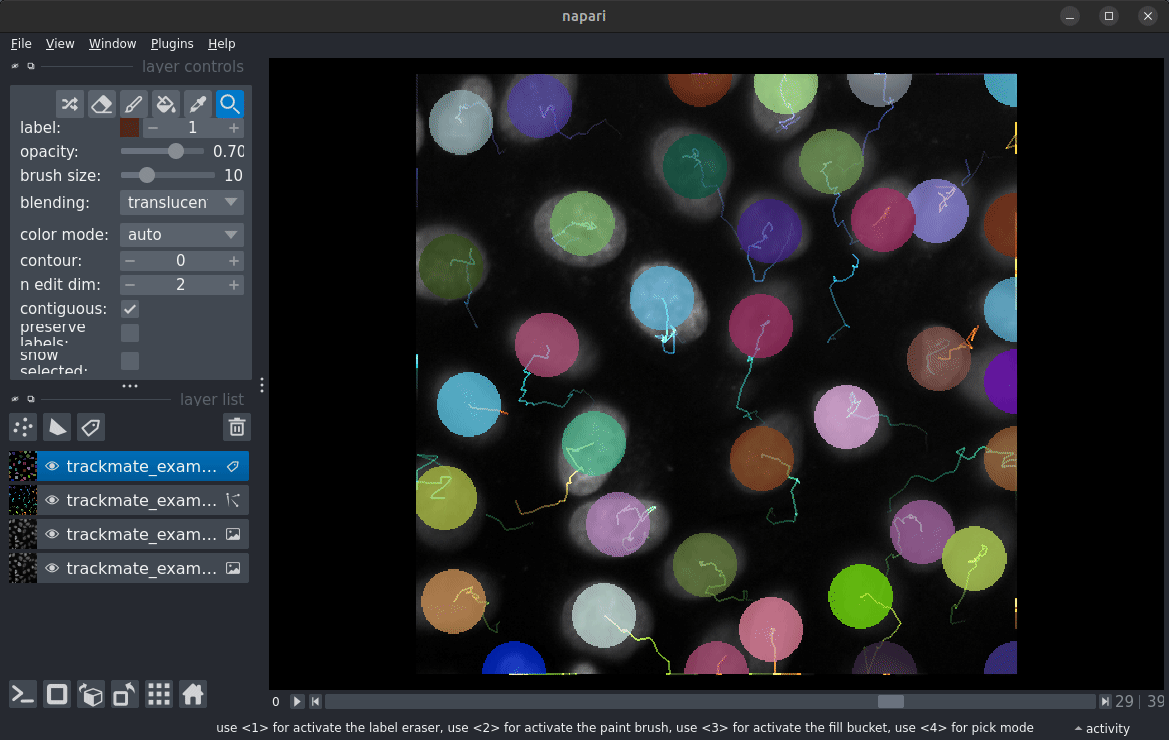
Once the spots and tracks have been generated, you can return to napari and use the left napari-imagej transfer button, highlighted below, to transfer the image data and the tracks back to napari.
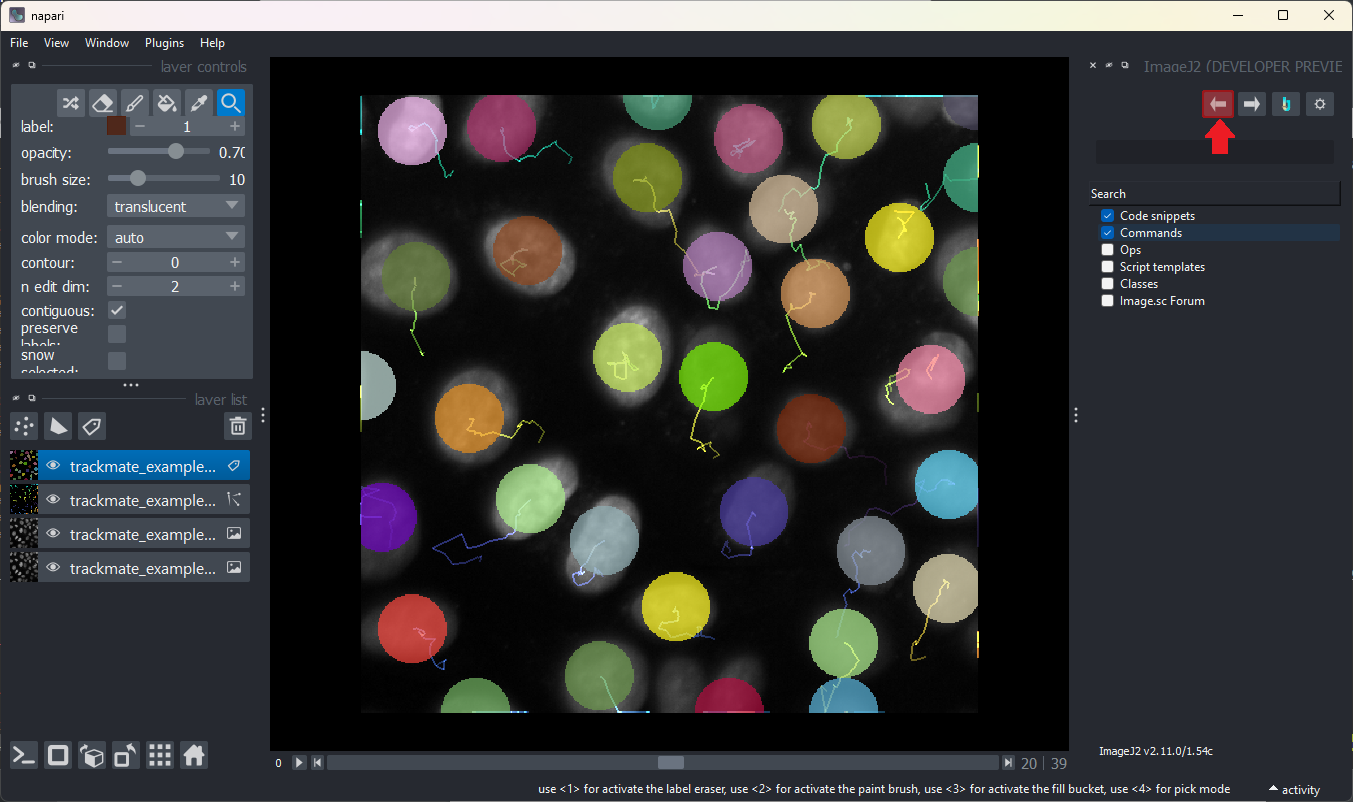
Transferring TrackMate results back to napari converts TrackMate’s tracks into napari tracks and TrackMate’s spots/detections into napari labels.
Processing tracks with napari-stracking
While the napari-stracking plugin is capable of performing its own particle tracking, it also comes with some track processing tools. We can install napari-stracking through the following steps:
Open the plugin installation window by selecting
Plugins>Install/Uninstall Plugins...from the napari menuAt the bottom of the plugin installation window, type
napari-strackinginto the search bar. PressInstallto install napari-stracking. Once napari-stracking appears in theInstalled Pluginssection of the plugin installation window, napari-stracking is installed and ready to use! PressCloseto return to the main napari window.
With napari-stracking installed, we can use it to measure the length and distance of the tracks generated from TrackMate:
Select
Plugins>napari-stracking>S Tracks Featuresto open napari-stracking’s feature algorithm.Ensure that the
trackmate_example_data.tif-trackslayer is selected in theTracks layerdropdown menu.In the
Add Featuredropdown menu, selectLength, and then clickAddto add track length as a feature.Still in the
Add Featuredropdown menu, selectDistance, and again clickAddto add track distance as a second feature.Click the
Runbutton to compute the features for each track.
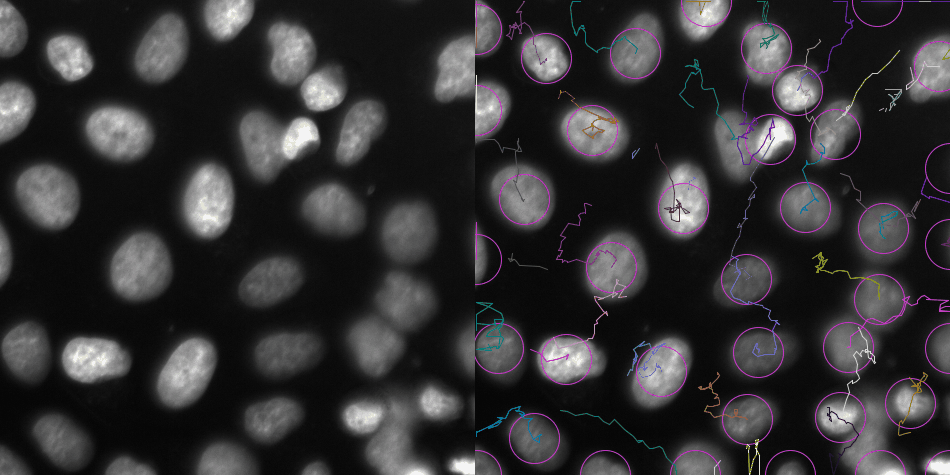
These steps are shown visually below:
You can also filter tracks. Here we filter for tracks that exist in all 40 frames:
Select
Plugins>napari-stracking>S Filter Trackto open napari-stracking’s track filtering algorithm.Ensure that the
trackmate_example_data.tif-trackslayer is selected in theTracks layerdropdown menu.In the
Add filterdropdown menu, selectFeatures, and then clickAddto add a filter.In the
Featurespane, selectlengthin theFeaturedropdown, and set bothMinandMaxto40.Click the
Runbutton to filter the tracks into a new tracks layer.
These steps are shown visually below: